Tuesday, January 15, 2013

Mid Winter Compost Tip

Here is a compost trick:

If you throw whole eggshells into your compost heap you are likely to get small pieces of egg shells in the finished compost: not ideal.  Manually crushing up your eggshells before you throw them into your compost pile will help them break down faster and more completely.  See the following pictures:

I save a bunch of old egg shells in the fridge and grind them all at once.  


I lay all of the eggshells in a cookie sheet and then dry them, one of a few ways. You can bake them in the oven at 170 degrees for an hour or so.  In the summer you can just put them in direct sunlight on a hot day.  I have also seen people put their egg shells over the grill on a long day of cooking to let the waste heat dry them out.  The goal is to simply dry out the eggshells and make them brittle.  However you achieve this will be fine.  *Be sure to keep your work station clean when handling wet egg shells so you don't accidentally spread or ingest harmful bacteria.  Wash your hands and materials well*    


I use a large mason jar to crush the egg shells.  The dry shells should break easily.  


Crush, crush, crush!


It only takes a minute to crush up all of the eggs.  


I will stick the crushed up egg shells in the fridge and await spring.  It is best to incorporate these nutrient rich food items directly into active compost.  I am afraid that if I throw the eggshells in my half frozen compost now, the rain and snow will wash them away.  


It is mid January, which means we have another two months or so before 'compost season' opens.   Even in winter you can be improving your compost skills and planning for next spring – make sure you are saving the ash from your fire place and eggshells from breakfast!
   
Interestingly, the same thing can be done to your eggshells if you want to feed them to your backyard chickens.  If you crush up your eggshells really well, you can add them to your chicken feed and recycle the calcium.  Recycling = Living Lighter on the Land   

Wednesday, January 9, 2013

Energy efficient refrigerator

When designing the solar system for the Armstrong House we calculated a number of 'load estimates', which aim to predict the house's energy consumption.  To provide a generous amount of comfort for the Armstrong House residents we needed to account for every little device they were predicted to use.  Imagine doing a load estimate for your house.....think about all the things you plug in:

DVD players, TVs, computers, hair dryers, coffee makers, blenders, lights and lamps (30 of them), stereos, cell phones, washing machines, garage door openers, video games, WIFI routers, toaster, microwave, water pumps, printers, fax machines, radios... the list can go on and on.  Some things you only use sporadically - like Christmas lights - so their overall burden on the electricity load isn't great.  Other items, such as your refrigerator, never quite - they just keep working away, 365 days a year.  These are the appliances that could end up pushing you over your electricity budget.  At the Armstrong House we invested in an energy efficient fridge/freezer called the Sun Frost RF 16, which boasts many technological advancements over your 'traditional' refrigerator.

Check out their brochure below or click here to see it in a PDF version.


Sarah Bush showing off our Sun Frost RF 16 refrigerator.  Loki the cat in the foreground.  


The walls of our freezer and refrigerator are quite thick, which means great insulation.  


Refrigerators become less efficient when their motors get dirty.  On our Sun Frost RF -16 the motor is on top where it can be easily cleaned.  

Remember, when you are trying to cut down on your household energy use you must address the appliances that run frequently like your fridge/freezer, computer (if you work from home) and dishwasher.

Wednesday, January 2, 2013

2013: A new, cold year...full of fresh greens

Happy New Year everyone.  Here in Pound Ridge, NY the temperatures have hovered around 30 F. for the past week.  Two storms dropped a total of 6 inches of snow on us after Christmas and in spite of the cold we continue to eat fresh salads at the Armstrong Education Center.  How is this possible?  With the use of 'cold frames'.      

The simple anatomy of a cold frame
Cold frames are just little boxes that trap and retain heat.  Just like a greenhouse, these little garden tools are used to create an interior growing environment that is warmer than the exterior environment.  It's all about the sun.  In the northern hemisphere, cold frames face the south and they are constructed and positioned in such a way that they collect as much direct light as possible during the day.  Notice that in the picture below the back wall is higher than the front wall.  When the transparent lid is placed on top of both these walls it sits at an angle facing south, toward the sun.  Inside the cold frame the soil heats up and the air is kept warm throughout the day.  Any insulation that is added to the cold frame helps to keep the air warm after the sun goes down.  In Pound Ridge, NY the climate allows us to grow a wide variety of 'cold hardy' greens, whiche are varieties of greens (like kale and lettuce) that can grow at cold temperatures and tolerate freezing temperatures.  In general, your summer varieties of greens will do poorly in a cold frame in January - stick with the 'cold hardy' greens.  Here is a list of what we are currently growing:

Forcea lettuce
Red Russian kale
Green kale
Arugula
Purple mizuna
Escarole
Italian dandelion
Pac choi
Tat soi, and
Hardy white scallion    

A cold frame is essentially a small, south facing green house used for extending the growing season.  The picture above shows the basic design, on which more bells and whistles can be added   


The following pictures were taken at the Armstrong House on New Years Eve, 2012.  You can see that snow is no problem for our cold frames - the little plants inside continue to thrive.


Our rectangular cold frames sit on the southern side of the Armstrong House.  You can see there that we removed some snow from the plexiglass on the cold frame's right side.  

A close up picture of the cold frame lid.  Can you see the condensation on the inside of  the plexiglass?  That is a great sign because it means that the temperature inside the cold frames is warm enough to evaporate water from the soil.  


Harvest time!  My partner Sarah Bush picks kale from one of our cold frames.  Examine the cold frame's construction: we used straw bales as insulation and lined the cold frame's inside with a thin reflective insulator.  Currently, our lid is not attached to any part of the cold frame - it just rests on top of the straw bales.  This method is not ideal for the long term but it seems to be working for now.      


Sarah Bush harvesting greens from our second cold frame.  You can see that on this 30 degree day, Sarah (a Tennessee native) is dressed for the cold.  The 'cold hearty' greens in our cold frames do just fine through the winter.  

There are hundreds of cold frame designs out there - many of which can be made with recycled materials. Just look at all the cold frames on Google images. Your cold frame design will vary depending on your growing goals, your space, your winter climate and your materials.  As long as you are achieving a warm temperature inside your cold frame, you are doing it right.  The straw bale cold frame pictured above is not a permanent structure because the straw will eventually rot and loose its ability to insulate.  In the future we may continue to use temporary straw bales or we may choose to design and construct a permanent cold frame. The sky is the limit.

Want to learn more?
The book Four Season Harvest by Elliot Coleman describes how to successfully grow food through the winter.  Elliot has mastered season extension through his work up in Maine.  Here in Westchester County, Stone Barns uses and demonstrates many different season extension methods to grow food through the winter.  In fact, it was the Stone Barns Vegetable Farm Manager Jack Algiere who assured Sarah and I that cold frames would work here in New York.    

Happy growing

Tuesday, December 18, 2012

Efficient home heating, Part 1.

Nighttime lows have been dipping into the twenties, making my cozy little home all the more comfortable.  The Armstrong House, the physical structure that protects me from the raw forces of nature, envelopes me in a bubble of evenly warmed air.  The source of this warmth: underfloor – or radiant – heating. Although winter is a great excuse to wear indoor slippers, they are not much needed as my floors radiate a steady stream of thermal energy.  On those early mornings when my cat's demands for breakfast rip me from the bed, my toes happily waltz naked across the heated floor.
Walking on heated floors is a delight in the Armstrong House


A little background on the Armstrong House 
When the Pound Ridge Land Conservancy (PRLC) committed to renovating the Armstrong House, they decided to use it as a showcase for simple energy efficient building and lifestyle choices.  The PRLC chose to prioritize energy efficiency because it realized that both prongs of conservation (land protection and sustainable lifestyles) need to be practiced and taught.  At the Armstrong Education Center we call this philosophy 'Living Lighter on the Land', and radiant heating is just one of the many ways we demonstrate a low-impact lifestyle.   

How radiant heating warms the Armstrong House
Like the tortoise, radiant heating (AKA, underfloor heating) is slow and steady.  There are many different radiant systems available – air, electric and water – which differ in their heat-carrying medium.  At the Armstrong House we use water (AKA, 'hydronic') to carry heat throughout the house.  Here is how our system works: roughly 90 degree water is continually pumped throughout the house in underfloor plastic 'PEX' tubes.  The water's heat energy leaves the tubes and radiates upward into the cooler room. Radiant heating systems can be thermostatically controlled, just like other home heating systems.  Take a look at the pictures below to understand the basic design of this heating system.

Underfloor tubing runs throughout the entire Armstrong House like in this picture.  

A picture of plastic 'PEX' tubing in a room.  This tubing will be covered by a floor.  

A detailed look at how radiant tubing sits under a floor.  


Radiant heating versus other types of heating
What makes radiant heating so efficient and great feeling is its omnipresence – the tubing underlies nearly all of a room's floor, which means that heat enters the room from almost every inch of ground.  Alternatively, radiators and forced-air systems rely on a few sources of very hot air, which is expected to permeate a space.  The result with these systems are drafts, hot pockets, cool pockets and – as you'll see – a room that is heated from the top down.


Two systems of heating compared.  Forced-air systems on the left and radiant floor systems on the right.  In most cases, radiant heating is more efficient and comfortable.  

Radiant heating literally heats a room from the bottom up, which means that the space occupied by people (the bottom six feet of the room) is the warmest and most comfortable.  Alternatively, by heating a room in a top-down manner (as in a forced air system), energy is wasted heating unused air.  This also creates very dramatic and noticeable differences in heat conditions between floors.  For example, I remember in my grandmother's house the second floor was brutally hot while the first floor was comfortable.  Besides being uncomfortable, this style of heating is inefficient.    


Comparing how heat fills a room in different heating systems.  Radiant heating on the left vs. force-air heating on the right.  

The body's response to different heating systems
It is said that radiant heating has advantages over other heating systems on a purely physiological level.  When looking at the heating preferences of the human body, our feet and legs like to be the warmest and our heads like to be the coolest.  The diagram below reiterates the point that a bottom up heating system has advantages over a top down heating system.


Our bodies like to be heated from the bottom up.  Our heads like to experience slightly cooler temperatures than our legs and feet.  


When trying to reduce your energy and resource use, you have to tackle the large energy hogs, like home heating.  Here in the north, many months are spent heating the home and an efficient system will make a large difference over time.  This post is Part one of a series on efficient home heating.  In part two I will show you how the water in our radiant system is heated.  Here's a hint:  Its big, yellow and likes to sit in the sky.  Stay tuned.      

More reading
There are lots of people talking/blogging about radiant heating technology.  It is found all across the country and applied in all sorts of buildings.  Here are some links.  Happy heating!

Tuesday, December 11, 2012

What to do with all this wood?!

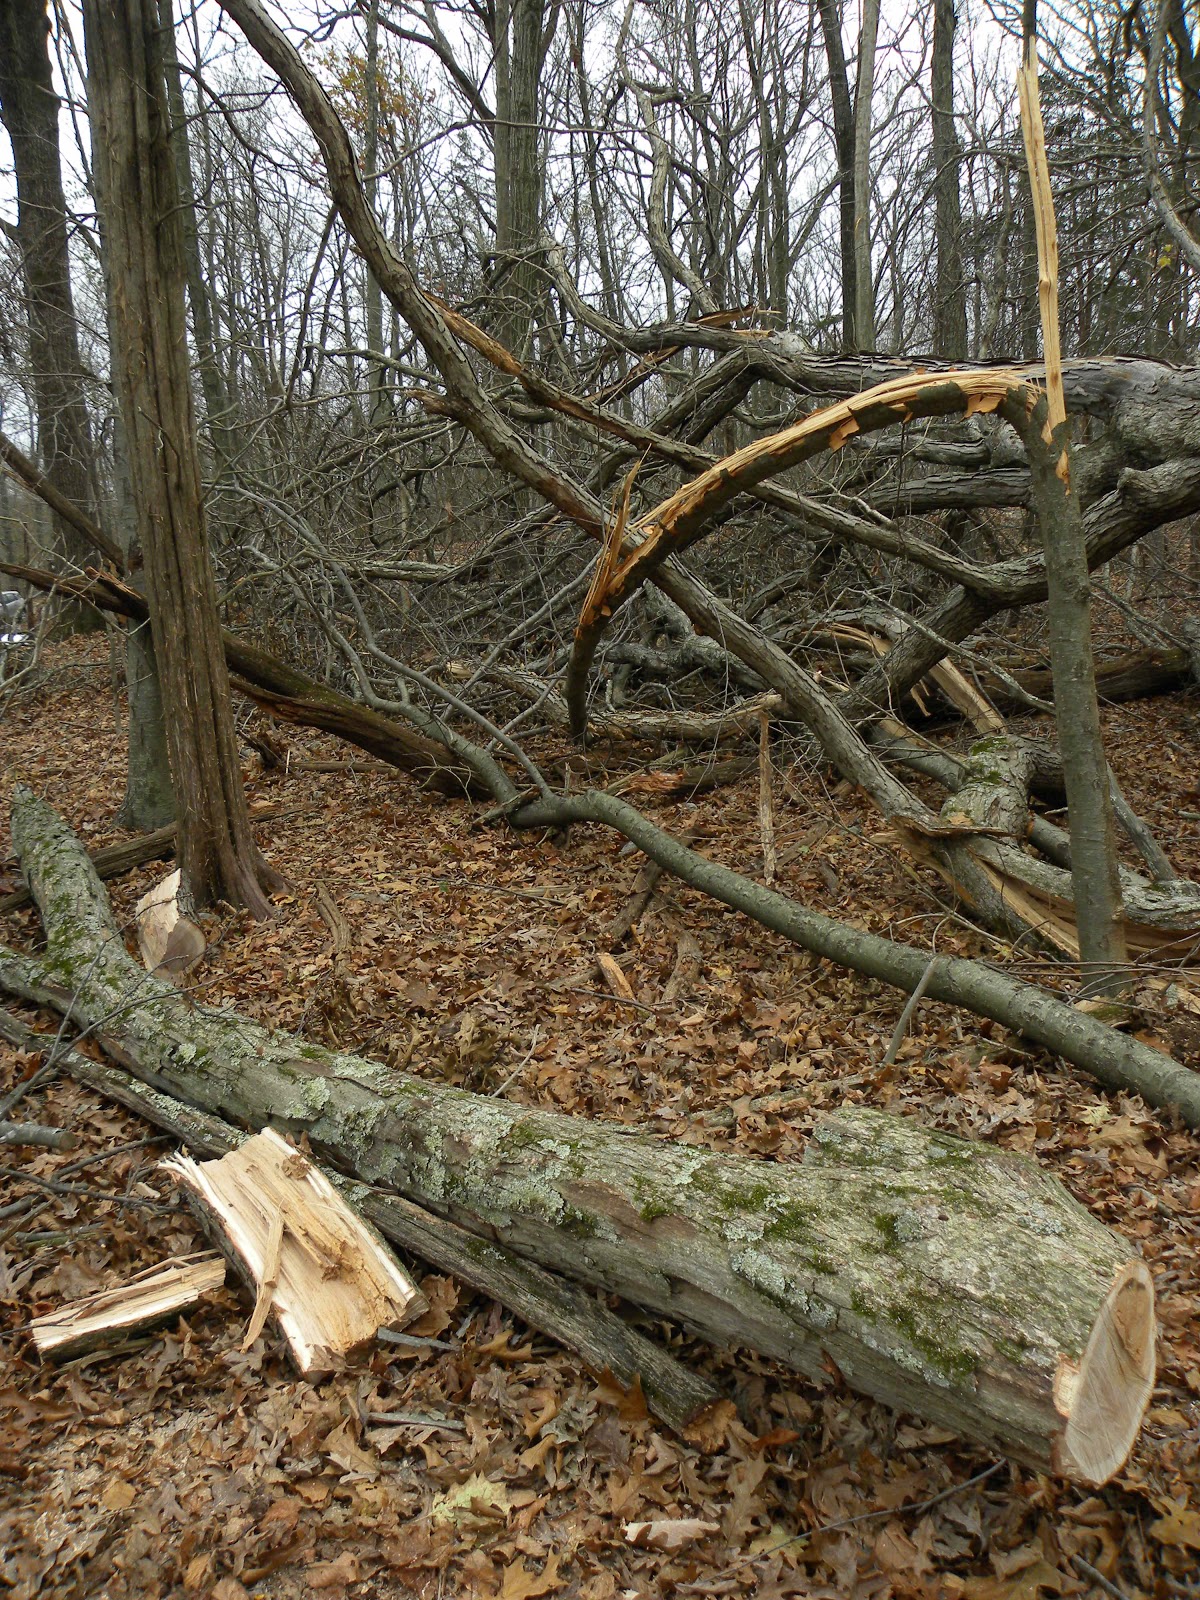
Hurricane Sandy happened over a month ago but the signs of her devastation still linger on: crushed roofs, fallen trees and the never ending buzz of chainsaws.  Of the thousands of trees that Sandy pushed over, many were next to people's homes and have since been cut up and removed.  Today's post highlights the role of dead wood in a forest ecosystem and stresses the ecological value of fallen debris. I will take you on a journey through the 'life' of a fallen dead tree:

Some of the many uses of fallen dead wood.  Dead wood is extremely valuable to the forest ecosystem as it provides food, shelter and a source of energy for future organisms.


A pile of sticks and branches makes great hiding places for animals


Once fallen, the crown of the tree (all the branches, limbs and twigs) rests on the ground.  Here it provides birds and mammals with shelter.  An impenetrable pile of sticks is difficult for us humans to move through but ideal for a warbler or a chipmunk hiding from a cooper's hawk.  The thin branches quickly break down and become incorporated into the soil's top layer where they continue to decompose and feed small critters.     


Bigger limbs fill up with insects, which attract hungry animals.


Larger limbs – like those pictured to the right – take years to break down.  They slowly begin to take on water and fill up with ants, beetles and grubs, which attract the pileated woodpecker and the northern flicker.  At every stage of decomposition, these dead limbs provide a unique habitat to decomposers which, in turn, prepare the wood for the next suitable suit of decomposers.  

Hollow logs attract a lot of animal activity.


Large logs may eventually become hollowed out.
These hollow logs act like little bunkers for forest mammals, used for eating in, hiding in and I like to think – napping in.  Exploring around one of these hollowed logs usually shows many sign of animal use such as scat (animal feces) and remnants of an animal meal.  


A 'snag' or standing dead tree.  


What about a dead tree that doesn't quite fall over? This type of dead wood (called a 'snag') is also very valuable to the forest ecosystem.  Snags will eventually fall to the ground and contribute pieces of wood to the soil but before they do, they act as a sort of wildlife condominium.  Notice the snag to the right.  See all the round holes?  These round holes happen when a rotted limb falls off or when excavated by a woodpecker.


A flying squirrel in a tree cavity.  Picture by me!


Once established, a tree cavity will be used for many years by squirrels, flying squirrels, owls, song birds and raccoons.  To read more about the importance of snags, see my Blog posts from March and April. 


There is a lot you can do with your downed wood to provide wildlife with useful habitat, shelter and food after a storm like Hurricane Sandy.  


1.  Leave logs on the ground to rot.  


2.  If you want to dress up your decomposing logs, you can turn them into rustic outdoor furniture.  


3.  Let broken trees stand and turn to snags.  


4.  Pile up downed branches to provide small animal habitat.   


At the Armstrong Education Center in Pound Ridge, NY I practice these different methods of using downed wood for wildlife.  As an added bonus you can expect to save some cash because these practices are often less expensive than paying a crew to cut, chip and haul your downed trees.  This is just another trick to Living Lighter on the Land.